


This article provides a comprehensive guide for sadza makers who want to achieve soft and smooth sadza. It begins by explaining the importance of choosing fine, fresh maize meal and the role of proper storage. The essential tools are discussed, including heavy-bottomed pots, wooden stirring sticks, whisks, and sieves. The article emphasizes the critical water-to-meal ratio, recommending a slurry method to prevent lumps. A detailed step-by-step guide covers preparation, initial mixing, cooking, gradual addition of meal, and final smoothing. Techniques for eliminating lumps, such as sieving, whisking, and pressing, are explained. Heat management and cooking time are addressed, with a focus on low and slow cooking to ensure even gelatinization. Common mistakes that ruin sadza are listed, along with regional variations and preferences. Advanced tips include using a double boiler, adding a little oil, resting the sadza, and practicing consistency. The article also introduces TAIFAI, a kitchen appliance manufacturer, and explains how its products like coffee grinders, food processors, and hand mixers can support African cooking. Troubleshooting for lumpy, stiff, or runny sadza is provided, followed by serving suggestions, nutritional considerations, and tool maintenance. Additional sections cover water quality, stirring techniques, timing, cultural significance, meal storage, high-altitude adjustments, large-quantity cooking, special diets, teaching others, and common myths. The conclusion reinforces that patience and practice are key to perfecting sadza. Overall, the article offers practical, third-person advice for any sadza maker seeking a consistently smooth and soft result.
Sadza, also known as pap, ugali, nshima, or sima, is a thick maize meal porridge that forms the cornerstone of many meals in Zimbabwe, South Africa, Zambia, Malawi, Kenya, Tanzania, and beyond. For the sadza maker, achieving a soft and smooth texture is a mark of skill and a source of pride. A perfectly cooked sadza should be glossy, lump-free, and tender enough to scoop with ease while still holding its shape when served with relish, vegetables, or meat. This article offers a comprehensive set of tips, techniques, and insights for any sadza maker who wishes to master the art of soft and smooth sadza. The guidance is presented from a third-person perspective, focusing on the practices that consistently yield excellent results.
Many factors influence the final texture of sadza. The type and freshness of the maize meal, the ratio of meal to water, the cooking temperature, the stirring technique, and the quality of the cooking utensils all play critical roles. A sadza maker who understands these variables can adjust them to produce the desired consistency every time. The following sections explore each factor in detail, providing practical advice that can be applied in home kitchens and larger cooking environments alike.
Before delving into specific tips, it is helpful for the sadza maker to understand what sadza is and why certain methods work better than others. Sadza is made from finely ground maize meal, which is cooked in water until it gelatinizes and forms a thick, cohesive paste. The starch in the maize meal absorbs water and swells when heated, creating the characteristic texture. The goal of a sadza maker is to facilitate even hydration and gelatinization without creating lumps or burning the mixture.
The type of maize meal used is the first major variable. In many regions, maize meal is classified as fine, medium, or coarse. Fine maize meal produces a smoother, softer sadza, while coarse meal results in a more textured, stiffer product. For soft and smooth sadza, fine maize meal is generally preferred. However, some sadza makers blend fine and coarse meals to achieve a balance between smoothness and body. The freshness of the meal also matters; old meal can be dry and may absorb water differently, leading to a less smooth final product.
undefined
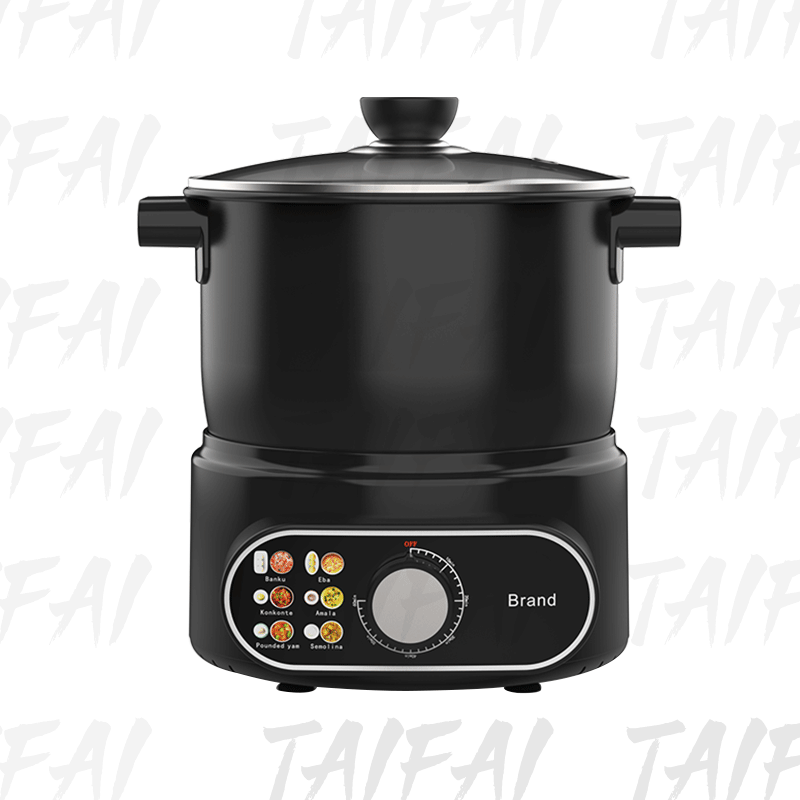
The sadza maker should select maize meal that is specifically labeled for sadza, pap, or ugali. These products are usually milled to a consistent fineness and may be fortified with vitamins and minerals. If the meal is too coarse, the sadza maker can sift it through a fine sieve to remove larger particles, which helps create a smoother texture. Sifting also breaks up any clumps that may have formed during storage.
Freshness can be assessed by smell and appearance. Good maize meal has a pleasant, slightly sweet aroma and a uniform color. It should not smell musty or sour. The sadza maker should store maize meal in an airtight container in a cool, dry place to maintain its quality. If the meal has been sitting for a long time, it may be better to use it for other dishes and purchase a fresh batch for sadza.
The tools used by a sadza maker can make the difference between a lumpy, burnt pot of sadza and a smooth, glossy one. While traditional tools are simple, they are highly effective. Modern appliances can also assist, but the sadza maker should understand their limitations.
A heavy-bottomed pot is essential. A thin pot conducts heat unevenly and can cause the sadza to burn at the bottom while remaining undercooked at the top. Cast iron, heavy stainless steel, or enamel-coated pots are excellent choices. The pot should be large enough to allow vigorous stirring without spilling. A pot with a tight-fitting lid is also useful for the resting phase.
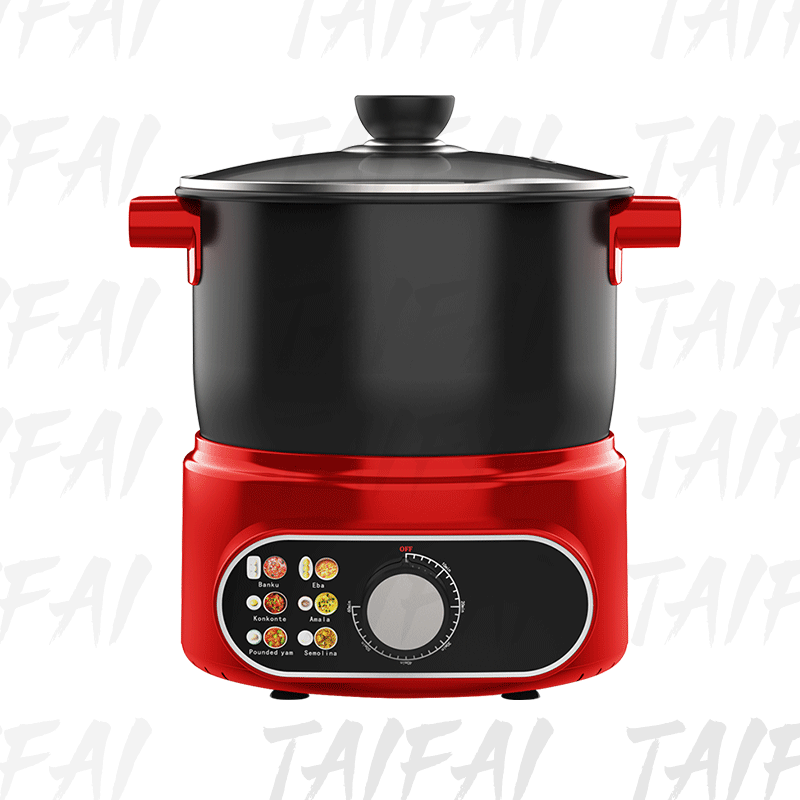
The traditional stirring stick, often called a mushini or wooden spoon, is the preferred tool for making sadza. Wood is gentle on the pot and provides a good grip. The stick should be long enough to keep the sadza maker's hands away from steam and hot splatters. It should have a flat edge for pressing out lumps and a sturdy handle. After use, the stick should be cleaned and dried thoroughly to prevent cracking.
Some sadza makers use electric hand mixers or stand mixers for the initial mixing of the slurry. This can be helpful, but the sadza maker must be cautious. Once the sadza thickens, an electric mixer may strain or burn out. Traditional manual stirring remains the most reliable method for the final stages.
The ratio of water to maize meal is one of the most important factors in achieving soft and smooth sadza. A sadza maker who masters this ratio can consistently produce the desired texture. The exact ratio depends on the type of meal, the desired stiffness, and the cooking method. As a general guide, soft sadza uses about one part maize meal to three or four parts water by volume. Stiffer sadza uses less water, often one part meal to two or two and a half parts water.
However, volume measurements can be inconsistent because maize meal can be compacted or aerated. Weight measurements are more precise. For soft sadza, a common ratio is 1 kilogram of maize meal to 3.5 to 4 liters of water. The sadza maker should start with a slightly wetter mixture and adjust by adding more meal if needed. It is easier to thicken sadza than to thin it without creating lumps.
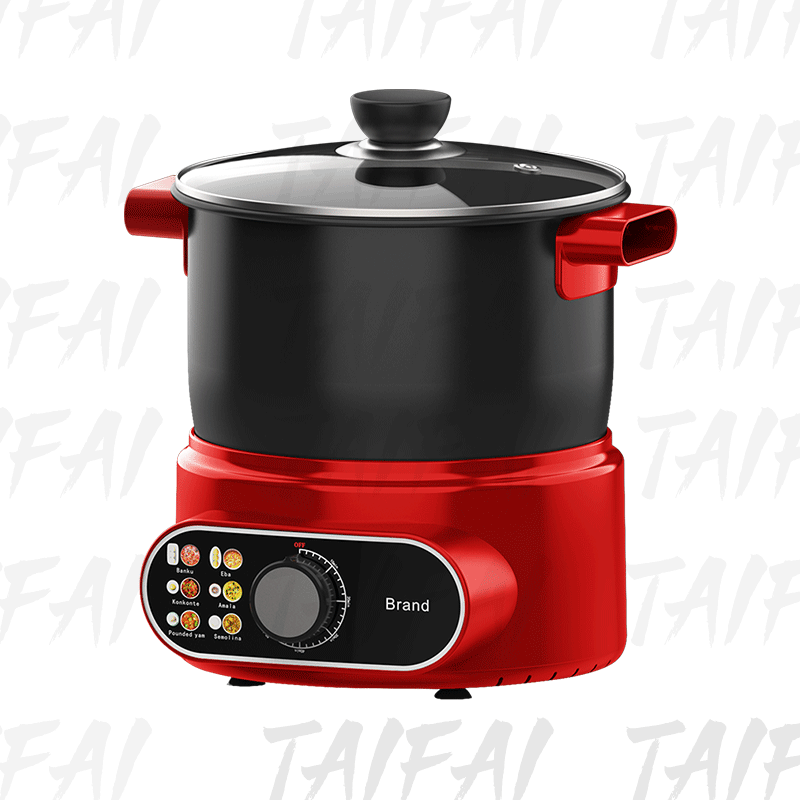
One of the most effective techniques for preventing lumps is to create a slurry before cooking. The sadza maker mixes a portion of the maize meal with cold water to form a smooth, lump-free paste. This slurry is then added to boiling water. The cold water allows the meal particles to separate and hydrate evenly before they encounter the heat that causes gelatinization. Without a slurry, adding dry meal directly to boiling water often results in lumps that are difficult to remove.
To make a slurry, the sadza maker combines about one cup of maize meal with two cups of cold water in a bowl. Using a whisk, they stir until the mixture is completely smooth. Any lumps should be pressed out against the side of the bowl. The slurry should have the consistency of thin pancake batter. It can be made ahead of time and allowed to rest for a few minutes, which further improves hydration.
After preparing the slurry, the sadza maker brings the remaining water to a rolling boil in the heavy pot. Once the water is boiling, they slowly pour the slurry into the pot while stirring continuously with the wooden stick. The mixture will begin to thicken almost immediately. The sadza maker must keep stirring to prevent the slurry from settling and burning at the bottom. This initial stage is critical for smoothness.
The following step-by-step guide distills the best practices for making soft and smooth sadza. The sadza maker can adapt the steps to their specific ingredients and equipment, but the core principles remain the same.
Before starting, the sadza maker gathers all ingredients and tools. They measure the maize meal and water, sift the meal if necessary, and have extra meal and hot water on hand for adjustments. The pot is placed on the stove, and the wooden stick is within reach. A small bowl of cold water is useful for wetting the spoon or hands later.
The sadza maker makes the slurry as described above. In a separate pot, they bring the main water to a boil. The ratio of water in the pot to water in the slurry should be considered; the slurry water counts toward the total liquid. Once the water is boiling, the sadza maker reduces the heat to medium and slowly pours the slurry into the pot, stirring constantly in one direction.
As the mixture heats, it will thicken. The sadza maker continues to stir vigorously, using a folding motion to bring the bottom of the pot to the top. This prevents burning and ensures even cooking. The stirring should be consistent and rhythmic. If the mixture becomes too thick to stir easily, the sadza maker can add a little hot water. If it is too thin, they can sprinkle in more maize meal, but only a little at a time to avoid lumps.
After the initial slurry has cooked for about five to ten minutes, the sadza maker begins to add the remaining maize meal. This is done gradually, using a handful or a spoon to sprinkle the meal over the surface while stirring. The meal should not be dumped in one spot. The sadza maker stirs after each addition, ensuring the new meal is fully incorporated before adding more. This gradual addition is key to a smooth texture.
Once all the meal has been added and the sadza has reached the desired consistency, the sadza maker reduces the heat to low. They continue to stir for another five to ten minutes. During this time, they use the back of the wooden stick to press out any small lumps against the side of the pot. The sadza should become glossy and pull away from the sides of the pot. Finally, the sadza maker covers the pot with a lid and allows the sadza to steam for five to ten minutes on low heat. This resting period helps the texture become even smoother and more cohesive.
Lumps are the enemy of smooth sadza. Even experienced sadza makers occasionally encounter them. The following techniques can help prevent and eliminate lumps.
Before cooking, the sadza maker should sift the maize meal through a fine-mesh sieve. This removes any hard clumps and larger particles. Sifting also aerates the meal, making it easier to incorporate into the water. If the meal is very fine, sifting may not be necessary, but it is a good habit for consistent results.
For the initial slurry, a whisk is more effective than a spoon at breaking up lumps. The sadza maker can also use a whisk during the early stages of cooking, before the mixture becomes too thick. Once the sadza thickens, a wooden stick is better because it can reach the bottom of the pot and press out lumps.
When lumps appear, the sadza maker should not ignore them. They can use the back of a wooden spoon or the flat side of the stirring stick to press the lumps against the side of the pot. This breaks them apart and incorporates them into the mixture. Patience is required; rushing this step can leave lumps intact.
High heat can cause the outside of the meal particles to gelatinize too quickly, trapping dry meal inside and creating lumps. The sadza maker should cook over medium to medium-low heat, especially during the addition of dry meal. Lower heat allows the meal to hydrate gradually.
The sadza maker must pay close attention to heat and cooking time. Sadza is not a dish that can be left unattended. Constant stirring is required, especially in the beginning.
Low and slow cooking allows the starch granules to absorb water fully and swell evenly. When the heat is too high, the outside of the granules cooks quickly while the inside remains dry, leading to a gritty texture. Medium heat is usually sufficient to maintain a gentle boil. The sadza maker should adjust the heat so that the sadza bubbles slowly but does not splatter violently.
The sadza is done when it is smooth, glossy, and pulls away from the sides of the pot. It should not taste raw or feel grainy on the tongue. The sadza maker can also test by dipping a spoon into the sadza and pulling it out; the sadza should cling to the spoon and not fall off immediately. The total cooking time varies from twenty to forty minutes, depending on the quantity and the type of meal.
Many sadza makers, especially beginners, make mistakes that lead to lumpy, stiff, or burnt sadza. Recognizing these mistakes can help avoid them.
The sadza maker who avoids these mistakes is well on the way to producing soft and smooth sadza.
Sadza is known by many names and has regional variations. Understanding these can help the sadza maker adjust techniques to suit different preferences.
Soft sadza, often called pap or porridge, is thinner and smoother. It is typically eaten with a spoon or used as a breakfast dish. Stiff sadza, often called ugali or nshima, is firmer and can be shaped into balls. The sadza maker can adjust the water-to-meal ratio to achieve either texture. For soft sadza, more water is used; for stiff sadza, less water and more meal are used.
In Zimbabwe, sadza is usually made from fine white maize meal and is served with a variety of relishes. In South Africa, pap can be crumbly or smooth, depending on the region. In Kenya, ugali is often made from white maize meal and is cooked until very stiff. In Tanzania, sima is similar to ugali. The sadza maker can learn from these traditions and adapt them to their own taste.
For sadza makers who want to elevate their craft, the following advanced tips can help.
Jiangmen Taifai Technology Co.,Ltd, known as TAIFAI, is a kitchen appliance manufacturer based in Jiangmen City, Guangdong Province, China. Founded in 2007, TAIFAI is a high-tech enterprise with capabilities in independent research and development, production, and sales. The company produces a wide range of kitchen electric appliances, including electric blenders, juicers, citrus juicers, hand mixers, hand blenders, stand mixers, coffee grinders, choppers, and food processors. TAIFAI supports OEM, ODM, and CKD arrangements, and it has been granted dozens of patents. The company owns fifty moulds and produces goods according to ISO9001:2015 standards, insisting on strict management of production operations and quality. Many of its products carry CE, CB, GS, and RoHS certifications, and they are known for fantastic design, good performance, multi-functionality, and reasonable prices. TAIFAI focuses on the manufacturing and service of kitchen electric appliances, positioning itself as a professional kitchen appliances manufacturer with excellent scale and technology in China. It is a high-quality kitchen electric appliances provider integrating design, research, development, production, sales, and service.
While TAIFAI does not manufacture traditional sadza makers, its appliances can support the broader cooking process. For example, a TAIFAI coffee grinder can be used to grind maize kernels into fresh meal, though the sadza maker should ensure the grind is fine enough. A TAIFAI food processor or chopper can prepare vegetables and meats for the relish that accompanies sadza. A TAIFAI hand mixer or stand mixer can be used to mix the initial slurry for sadza, provided the sadza maker uses a low speed and does not overburden the motor. For large batches, a TAIFAI hand blender might help blend the slurry, but it is not designed for thick, stiff sadza. The sadza maker should always follow the appliance manufacturer's instructions and avoid using appliances beyond their intended capacity. TAIFAI's commitment to quality and innovation reflects the same principles that guide a skilled sadza maker: precision, consistency, and attention to detail.
Even with the best techniques, problems can arise. The sadza maker should know how to troubleshoot and correct issues without starting over.
If lumps have formed, the sadza maker can use a whisk or wooden stick to press them against the side of the pot. Another method is to transfer the sadza to a blender or food processor in small batches and blend until smooth, then return it to the pot and cook briefly. However, this changes the texture and is not ideal for stiff sadza. Prevention is always better.
If the sadza is too stiff, the sadza maker can add hot water a little at a time, stirring constantly. The water should be hot, not cold, to avoid cooling the sadza and creating lumps. The sadza maker should continue to stir until the water is fully absorbed and the desired consistency is reached.
If the sadza is too soft, the sadza maker can sprinkle in more maize meal, a little at a time, while stirring. The meal should be dry and fine. After each addition, the sadza maker should cook for a few minutes to allow the meal to hydrate and thicken the mixture.
The way sadza is served can enhance the dining experience. The sadza maker should consider the following tips.
Sadza is traditionally served with a relish, which can be made from vegetables, beans, meat, or fish. Common relishes include muriwo (greens), nyama (meat), and mupunga (rice). The sadza maker can prepare a variety of relishes to complement the sadza. The smooth texture of the sadza contrasts well with the flavors of the relish.
Sadza can be served in a communal bowl or shaped into individual balls. To shape sadza, the sadza maker wets their hands or a spoon with water and scoops a portion of sadza. They then roll it into a ball. The balls can be placed on a plate around the relish. For a more elegant presentation, the sadza maker can use a wet ice cream scoop to form uniform balls.
Sadza is a source of carbohydrates, primarily from maize. Many commercial maize meals are fortified with vitamins and minerals, such as vitamin A, thiamine, riboflavin, niacin, pyridoxine, folic acid, and iron. The sadza maker should check the packaging for fortification information. Smooth sadza is easier to digest than lumpy sadza, which can be beneficial for children and the elderly. However, sadza should be part of a balanced diet that includes vegetables, proteins, and healthy fats.
Proper cleaning and maintenance of tools prolong their life and ensure food safety. The sadza maker should follow these guidelines.
After making sadza, the pot should be soaked in warm water to loosen any stuck-on residue. A wooden spoon or plastic scraper can be used to remove the sadza. Avoid using metal scouring pads on non-stick or enamel pots, as they can scratch the surface. Once cleaned, the pot should be dried thoroughly.
The wooden stirring stick should be washed with warm water and a mild detergent. It should not be soaked for long periods, as this can cause the wood to crack. After washing, the stick should be dried completely and stored in a dry place. Occasionally, the stick can be rubbed with food-grade mineral oil to keep the wood conditioned.
While it is possible to make sadza in a microwave, the results are often uneven. The sadza maker would need to stir frequently and use a microwave-safe pot. Traditional stovetop methods are recommended for best texture.
Freshly made sadza is best eaten immediately. Leftover sadza can be stored in the refrigerator for up to two days. It can be reheated by steaming or frying. When reheating, the sadza maker should add a little water to prevent drying.
Yes, sadza can be made from other grains, such as millet, sorghum, or cassava flour. However, the cooking times and water ratios may differ. The sadza maker should experiment to find the best method for each grain.
Sifting is not strictly necessary, but it helps prevent lumps and ensures a smoother texture. The sadza maker who wants the softest possible sadza should sift the meal.
A heavy-bottomed pot is best. Cast iron, heavy stainless steel, or enamel-coated pots are excellent choices. They distribute heat evenly and reduce the risk of burning.
Water quality can affect the taste and texture of sadza. Hard water contains minerals that can interfere with starch gelatinization, potentially leading to a less smooth texture. The sadza maker should use filtered or soft water if possible. If only hard water is available, the sadza maker can add a pinch of salt or a teaspoon of lemon juice to help soften the water, though this may slightly alter the flavor. The sadza maker should taste the water to ensure it is clean and free of odors.
The way the sadza maker stirs is crucial. Stirring in one direction helps develop the starch network and creates a smoother texture. Changing direction can break the network and lead to lumps. The sadza maker should use a folding motion, bringing the sadza from the bottom of the pot to the top. This ensures even cooking and prevents burning. The sadza maker should also scrape the sides and bottom of the pot frequently.
Experienced sadza makers use a rhythmic wrist motion that is efficient and tireless. They hold the stirring stick near the top and use their whole arm, not just the wrist. This generates more force and allows them to stir thick sadza for extended periods. The sadza maker should practice this motion to build stamina.
During the initial cooking, vigorous stirring is necessary to prevent lumps and burning. As the sadza thickens, the sadza maker can reduce the intensity but should still stir constantly. In the final stages, gentle folding helps smooth the texture without overworking the starch.
Timing is everything. The sadza maker should not rush the process. The initial boil and slurry addition require about five minutes of constant stirring. The gradual addition of meal can take another ten to fifteen minutes. The final cooking and smoothing can take ten to twenty minutes. The sadza maker should adjust the heat to maintain a gentle simmer. If the sadza is bubbling too vigorously, the heat is too high. If it is not bubbling at all, the heat is too low.
Some sadza makers use a kitchen thermometer to monitor the temperature. Sadza gelatinizes at around 70 to 80 degrees Celsius. Keeping the sadza at this temperature range ensures proper gelatinization without burning. However, most traditional sadza makers rely on visual and tactile cues.
Sadza is more than just food; it is a cultural staple with deep historical roots. In many African cultures, sadza is a symbol of hospitality and community. It is often served at weddings, funerals, and other important gatherings. The sadza maker who can produce soft and smooth sadza is highly respected. The ability to make perfect sadza is passed down through generations, often from mother to daughter. The sadza maker should take pride in this tradition and continue to practice and share their skills.
In many households, sadza is eaten daily, often with a variety of relishes. The sadza maker becomes adept at making sadza quickly and efficiently. However, even daily sadza deserves care and attention. A smooth, soft sadza elevates the entire meal.
The sadza maker should buy maize meal from reputable suppliers. In some regions, maize meal is sold in bulk, which can be economical but requires careful storage. The sadza maker should store meal in airtight containers away from moisture, heat, and sunlight. Whole grain maize meal has a shorter shelf life than refined meal because the oils in the germ can become rancid. The sadza maker should check the expiration date and use the meal within a reasonable time.
For long-term storage, the sadza maker can freeze maize meal. Freezing prevents weevils and preserves freshness. The meal should be placed in a freezer-safe bag or container, with as much air removed as possible. Before use, the sadza maker should allow the meal to come to room temperature to prevent condensation, which can cause clumping.
At high altitudes, water boils at a lower temperature, which can affect the cooking of sadza. The sadza maker may need to cook the sadza longer and use slightly more water to achieve the desired texture. A pressure cooker can be used to raise the boiling point, but the sadza maker should follow safety guidelines and adjust cooking times.
When making sadza for a large group, the sadza maker should use a large, heavy pot and a long stirring stick. The ratio of water to meal remains the same, but the cooking time increases. The sadza maker should stir even more frequently to prevent burning. It may be helpful to have an assistant to help with stirring or to hold the pot steady. For very large batches, a mechanical stirrer or a heavy-duty stand mixer with a dough hook might be used, but the sadza maker must monitor the texture closely.
Some people may need to modify sadza for dietary reasons. For example, a sadza maker preparing food for someone with diabetes may use a blend of maize meal and whole grain flours to lower the glycemic index. For a gluten-free diet, sadza is naturally gluten-free, but the sadza maker should ensure that the maize meal is not contaminated with wheat. For a low-sodium diet, the sadza maker should avoid adding salt. Sadza is versatile and can be adapted to many dietary needs.
Sharing the skill of sadza making is a rewarding experience. The sadza maker who teaches others should emphasize the importance of patience, practice, and attention to detail. They should demonstrate the slurry method, the stirring technique, and the signs of doneness. They should also encourage the learner to taste and adjust. With guidance, anyone can learn to make soft and smooth sadza.
There are many myths about making sadza. Some believe that sadza must be stirred in only one direction, while others say direction does not matter. Some believe that adding salt makes sadza smooth, while others avoid salt. Some believe that sadza must be cooked for hours. The sadza maker should rely on tested techniques and personal experience rather than myths. The tips in this article are based on practical experience and scientific principles.
Perfecting sadza takes time. The sadza maker should not be discouraged by initial failures. Each batch is a learning opportunity. By focusing on the key variables—meal quality, water ratio, heat, and stirring—the sadza maker can steadily improve. Eventually, making soft and smooth sadza will become second nature. The sadza maker will be able to judge the right consistency by feel and sight, adjusting as needed. This level of skill is the mark of a true sadza maker.
Making soft and smooth sadza is a skill that any sadza maker can develop with practice and attention to detail. The key tips include using fine, fresh maize meal, creating a smooth slurry, cooking over medium heat, stirring constantly, adding meal gradually, and allowing the sadza to rest before serving. By avoiding common mistakes and troubleshooting issues as they arise, the sadza maker can consistently produce a delicious, lump-free sadza that complements any relish. Whether cooking for family, friends, or a community gathering, the sadza maker who follows these guidelines will be rewarded with a dish that is both comforting and impressive.
The sadza maker should also remember that cooking is a journey. Each batch provides an opportunity to learn and improve. With patience and practice, the techniques described in this article will become second nature. And for those who use modern kitchen appliances, brands like TAIFAI offer quality tools that can assist in preparing ingredients and supporting the cooking process, though the heart of sadza making remains the skilled hands and keen eye of the sadza maker.
In the end, soft and smooth sadza is a testament to the sadza maker's dedication. It is a simple food, but it carries deep cultural significance and brings people together. By mastering the tips outlined here, the sadza maker honors that tradition while enjoying the fruits of their labor.


