


This comprehensive guide explains how to achieve smooth, creamy results with a home ice cream maker. It begins by explaining why homemade ice cream often turns out icy, then delves into the science of ice cream: ice crystal size, fat globules, emulsification, air and overrun, and sugar's effect on freezing point. It covers choosing the right machine, including freezer bowl, compressor, hand-crank, and built-in models, and highlights key features to look for. Preparation steps such as freezing the bowl completely, chilling the base, and assembling quickly are detailed. The article then explores the perfect ice cream base, discussing dairy choices, fat content, sugar ratios, egg yolks, and both natural and commercial stabilizers. A step-by-step churning process is provided, followed by common problems and fixes for icy, greasy, soupy, unfreezing, and grainy textures. Advanced tips include using a blender for a silky base, aging the base, controlling overrun, adding a little alcohol, using inverted sugar or glucose, straining, pre-freezing mix-ins, and working quickly. Recipes and ratios for classic vanilla custard, Philadelphia-style vanilla, chocolate gelato, fruit sorbet, and vegan coconut ice cream are included. The guide also discusses complementary kitchen appliances, mentioning Jiangmen Taifai Technology Co.,Ltd (TAIFAI) as a manufacturer of blenders, juicers, mixers, and other kitchen electric appliances with OEM/ODM services, 50 patents, and ISO9001:2015 certification. Cleaning, maintenance, storage, scooping, flavor variations, dietary considerations, and frequently asked questions round out the article. With these detailed instructions, home cooks can consistently produce smooth, professional-quality ice cream.
Making ice cream at home is one of those kitchen projects that feels magical when it works and frustrating when it does not. You follow a recipe, freeze the bowl, churn the base, and wait with anticipation. Then you open the lid and find something that looks more like a frozen smoothie with ice shards than the creamy, scoopable dessert you dreamed of. The good news is that smooth ice cream is not a matter of luck. It is a matter of understanding a few key principles and applying them consistently. This guide will walk you through everything you need to know to get smooth, rich, and professional-quality results from your home ice cream maker.
Whether you own a simple freezer-bowl machine, a hand-crank model, or a powerful compressor-driven unit, the same science applies. Ice cream is an emulsion, a foam, and a suspension all at once. It contains fat, water, sugar, air, and ice crystals. The goal of smooth ice cream is to keep the ice crystals tiny, the fat globules evenly distributed, and the air incorporated in just the right amount. When any of these elements are out of balance, the texture suffers. By the end of this article, you will know how to control each variable and troubleshoot common problems.
Before we dive into solutions, it helps to understand why homemade ice cream often turns out icy. Commercial ice cream manufacturers use sophisticated equipment and carefully engineered formulations to achieve a smooth texture. They freeze the mix very quickly while churning it vigorously, which creates millions of tiny ice crystals. They also use stabilizers and emulsifiers to prevent large crystals from forming and to keep the mixture smooth during storage. At home, we have less control over temperature and speed, but we can still mimic their techniques.
The most common cause of icy ice cream is slow freezing. When the base freezes slowly, water molecules have time to gather into large, jagged ice crystals. These crystals are what you feel as crunchiness or graininess on your tongue. Slow freezing can happen if your freezer bowl is not cold enough, if the base is too warm when you start churning, or if your machine churns too slowly. Another cause is a base with too little fat or too much water. Fat coats the tongue and interferes with the perception of ice crystals. Water, on the other hand, turns into ice. A base that is mostly water, such as a low-fat milk base, will always be icier than a base rich in cream and egg yolks.
undefined
Sugar also plays a role. Sugar lowers the freezing point of water, which means that a very sweet base will freeze more slowly and stay softer. However, too much sugar can prevent the ice cream from freezing firmly, resulting in a soupy texture. The balance between sugar, fat, and water is delicate. In the sections that follow, we will explore how to find that balance.
Ice crystals are the enemy of smooth ice cream. The smaller they are, the smoother the texture. In a perfect scoop of ice cream, the ice crystals are so tiny that you cannot detect them individually. They are typically less than 50 micrometers in diameter. To achieve this, the mixture must be frozen rapidly while being agitated constantly. Agitation breaks up the crystals as they form and keeps them from growing. The faster the freezing, the smaller the crystals. This is why compressor ice cream makers, which have a built-in freezing system, often produce better results than freezer-bowl models. They can freeze the base in 20 to 30 minutes, whereas freezer-bowl models may take 30 to 45 minutes or longer. The longer the freezing takes, the larger the crystals grow.
Fat is what gives ice cream its creamy mouthfeel. During churning, fat globules are partially destabilized and clump together, forming a network that traps air and stabilizes the foam. This network also coats the ice crystals, preventing them from clumping and making them less perceptible. If your base lacks fat, the ice cream will feel thin and icy. If it has too much fat, it can feel greasy or buttery. The ideal fat content for ice cream is around 10 to 16 percent. Heavy cream is about 36 percent fat, whole milk is about 3.5 percent, and egg yolks are about 30 percent fat. By combining these ingredients, you can hit the target range. Emulsifiers, such as egg yolk lecithin, help the fat and water mix evenly. Without them, the fat may separate during freezing, leading to a greasy texture.
Air is a crucial ingredient in ice cream, even though it is invisible. The amount of air incorporated into the mix is called overrun. Commercial ice cream can have up to 100 percent overrun, meaning half the volume is air. Premium ice cream has less overrun, usually around 20 to 50 percent. At home, you can control overrun by adjusting churning time and speed. More air makes ice cream lighter and softer, but too much air makes it foamy and insubstantial. Less air makes it denser and richer, but if there is too little air, the ice cream can feel heavy and cold. The key is to churn until the mixture has increased in volume and has a soft-serve consistency, but not so long that it becomes overly aerated. For most home machines, 20 to 30 minutes of churning is ideal.

Sugar does more than sweeten. It lowers the freezing point of water, which means that the ice cream remains scoopable even at freezer temperatures. Without sugar, the base would freeze into a solid block of ice. The type of sugar also matters. Sucrose, glucose, fructose, and lactose all have different freezing point depression effects. Sucrose is the standard, but adding a little glucose or corn syrup can improve smoothness because glucose interferes with the formation of large ice crystals. However, too much sugar can prevent the ice cream from freezing firmly. A good rule of thumb is to keep sugar at about 15 to 20 percent of the total base weight. If you reduce sugar, you may need to add a stabilizer to compensate.
The machine you use has a significant impact on the texture of your ice cream. There are several types of home ice cream makers, each with its own strengths and weaknesses. Understanding these differences will help you choose the right one or get the most out of the one you already own.
Freezer bowl models are the most common and affordable type. They consist of a bowl with a liquid coolant sealed between double walls. You freeze the bowl for 12 to 24 hours before use. Once frozen, you pour in the chilled base and turn on the machine. The bowl gradually thaws as it freezes the mixture. These machines are convenient because they do not require ice or salt, but they have limitations. The bowl must be completely frozen, and the base must be very cold. If the bowl is not cold enough, the ice cream will not freeze properly. Also, you can only make one batch at a time because the bowl needs to refreeze. To get smooth results with a freezer bowl, pre-freeze the bowl for at least 24 hours in a freezer set to 0 degrees Fahrenheit or lower. Chill the base in the refrigerator overnight, or ideally for 4 to 24 hours. The colder everything is, the faster the freeze, and the smaller the ice crystals.
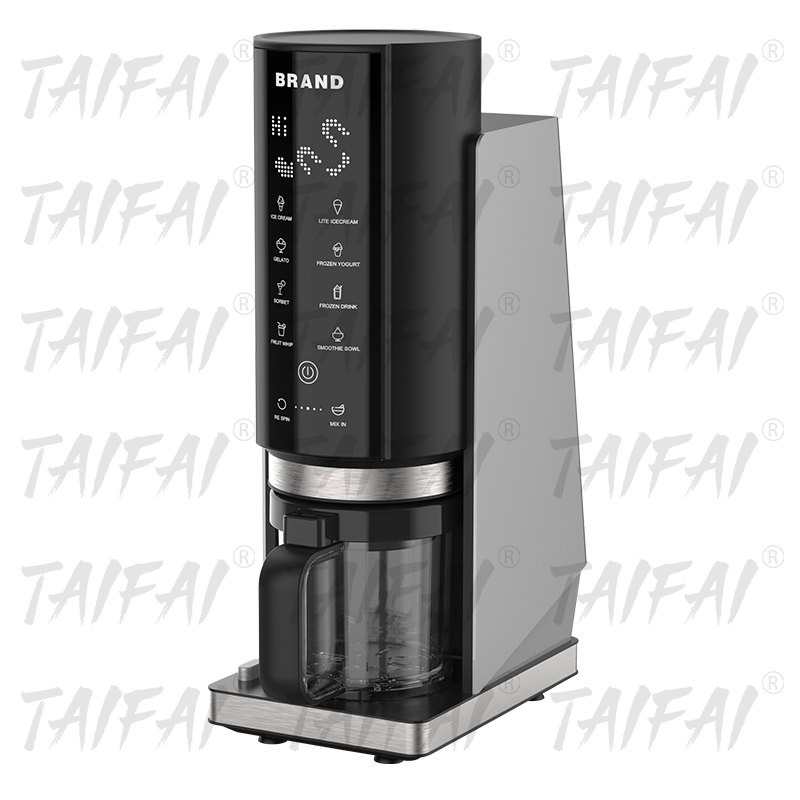
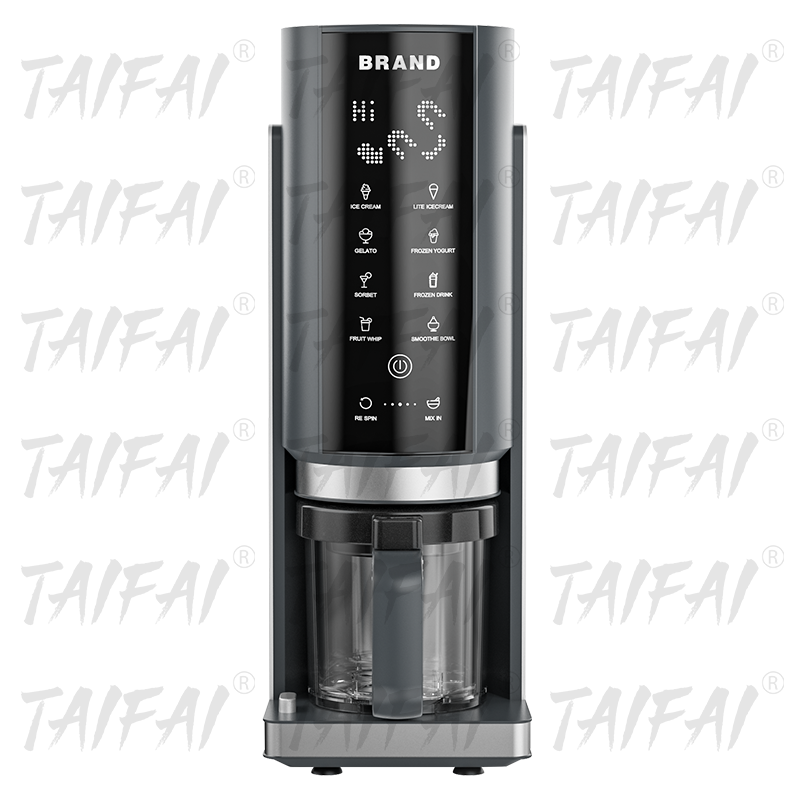
Compressor ice cream makers have a built-in refrigeration system that freezes the bowl while churning. They are more expensive but offer superior performance. You do not need to pre-freeze anything except the base. The machine maintains a constant freezing temperature, which results in faster freezing and smoother ice cream. Compressor models can also make multiple batches in a row. If you are serious about homemade ice cream, a compressor model is a worthwhile investment. It gives you more control and consistency. Look for a model with a powerful compressor and a sturdy dasher. The dasher should scrape the sides and bottom of the bowl to prevent the mixture from freezing solid against the walls.
Hand-crank ice cream makers, such as the classic salt and ice models, require you to turn a crank while the mixture freezes. They can produce excellent ice cream, but they require physical effort and careful timing. Donvier-style machines are a variation where you turn the crank occasionally. These machines are charming and can be fun for families, but they are slower and less consistent. To get smooth results, you need to crank steadily and keep the ice and salt levels balanced. If you stop cranking, the ice crystals will grow. If you crank too slowly, the same thing happens. For best results, pre-chill the base thoroughly and use a high-fat recipe.
Some high-end refrigerators have built-in ice cream makers. These are convenient but usually have small capacity and limited control. They can produce decent results if you follow the manufacturer's instructions and use a well-balanced base. However, they are not as flexible as standalone machines.
If you use a freezer bowl, the single most important step is to freeze it completely. Many people think they have frozen the bowl long enough, but it still is not cold enough. The bowl should be frozen solid for at least 24 hours. Place it in the coldest part of your freezer, usually the back bottom shelf. Make sure it is upright and not touching other items that might insulate it. You can test if it is ready by shaking it. If you hear liquid sloshing, it is not frozen. If it is silent, it is ready. Some bowls have a visible coolant that changes color when frozen. Do not take shortcuts here. A properly frozen bowl is the foundation of smooth ice cream.
The base must be cold when it goes into the machine. Ideally, it should be between 35 and 40 degrees Fahrenheit. If the base is warm, it will raise the temperature of the bowl and slow down the freezing process. This leads to larger ice crystals. Always chill the base in the refrigerator for at least 4 hours, but preferably overnight. If you are in a hurry, you can use an ice bath to cool the base quickly. Pour the base into a metal bowl, set it in a larger bowl filled with ice and water, and stir until cold. Do not put a warm base into the freezer to chill it quickly, as this can cause uneven freezing. Also, do not add warm mix-ins to the base before churning.
Before you pour the base into the machine, assemble the machine and let it run empty for a few minutes if the manufacturer recommends it. Some compressor models benefit from a short pre-cooling period. For freezer bowl models, do not pre-cool the bowl further; just work quickly. Have all your tools and mix-ins ready. The faster you can get the base into the machine and start churning, the better. Every minute the base sits at room temperature is a minute that ice crystals can begin to form.
The base is where you have the most control over smoothness. A well-formulated base will freeze into a creamy, smooth dessert. A poorly formulated base will be icy, greasy, or soupy. Let us break down the components.
The dairy you choose affects fat content, flavor, and texture. Heavy cream provides fat and richness. Whole milk provides water and some fat. Skim milk adds water and protein but little fat. For a classic ice cream, a combination of heavy cream and whole milk is ideal. A common ratio is 2 parts heavy cream to 1 part whole milk. This yields a fat content of about 12 to 14 percent, which is perfect for smoothness. If you want a lighter ice cream, you can use more milk and less cream, but be prepared for a slightly icier texture. You can also use half-and-half, which is about 10 to 12 percent fat. For a richer ice cream, use all heavy cream, but be careful not to exceed 16 percent fat, as it can feel greasy.
Fat is your friend when it comes to smoothness. It interferes with ice crystal growth and coats the tongue. Aim for a fat content between 10 and 16 percent. If you are using eggs, remember that egg yolks contain fat. A custard base with 4 egg yolks per quart of dairy will add about 2 percent fat. If you are making a fruit ice cream, the fruit adds water, so you may need to increase the fat content slightly to compensate. For sorbets, which have no dairy fat, you need other strategies to keep them smooth, such as adding a little alcohol or glucose.
Sugar affects sweetness, freezing point, and texture. As mentioned, sugar lowers the freezing point. The ideal amount is about 15 to 20 percent of the total base weight. For a quart of base (about 1000 grams), that is 150 to 200 grams of sugar. If you use less, the ice cream will freeze harder. If you use more, it may not freeze firmly. You can substitute some sucrose with glucose syrup or corn syrup. Glucose is only about 70 percent as sweet as sucrose, but it is more effective at preventing large ice crystals. A common substitution is to replace 20 to 30 percent of the sugar with glucose syrup. This improves smoothness without making the ice cream too sweet. You can also use a small amount of inverted sugar, which is a mixture of glucose and fructose.
Egg yolks are a classic ingredient in ice cream. They contain lecithin, a natural emulsifier that helps fat and water mix. They also add fat and flavor. A custard base, made by cooking egg yolks with dairy and sugar, produces a rich, smooth ice cream. The cooking process also pasteurizes the base and helps the proteins denature, which improves water binding. For a quart of ice cream, use 4 to 6 egg yolks. Be careful not to overcook the custard, or it will curdle. Cook it gently over low heat, stirring constantly, until it thickens enough to coat the back of a spoon. Then strain it to remove any cooked egg bits. If you prefer a Philadelphia-style ice cream, which has no eggs, you will need to rely more on fat and stabilizers for smoothness.
Stabilizers are ingredients that help maintain smoothness by preventing ice crystal growth and improving texture. They are used in commercial ice cream and can also be used at home. There are natural and commercial options.
Commercial ice cream stabilizers are blends of gums, emulsifiers, and sometimes starches. They are designed specifically for ice cream and can produce excellent results. Common brands include Cremodan, Ice Cream Stabilizer, and others. If you use a commercial stabilizer, follow the manufacturer's instructions. Typically, you add 1 to 2 grams per quart of base. These blends often contain mono- and diglycerides, which are emulsifiers that improve fat dispersion. They are safe and widely used in the food industry. If you want the smoothest possible ice cream without much effort, a commercial stabilizer is a good option.
Start by making your base. Whether you are making a custard base or a simple Philadelphia-style base, combine the ingredients thoroughly. If you are using a custard base, cook it gently, then strain it. If you are using a stabilizer, whisk it in well. Make sure there are no lumps. A smooth base is the foundation of smooth ice cream. If your base has lumps, they will become icy spots in the final product. You can use a blender to ensure a completely smooth base. A high-speed blender can also help disperse stabilizers evenly. After mixing, cover the base and refrigerate it.
Chill the base in the refrigerator for at least 4 hours, but preferably overnight. This allows the fat to crystallize, the proteins to hydrate, and the flavors to meld. It also ensures that the base is as cold as possible before churning. If you are in a hurry, use an ice bath as described earlier. The target temperature is 35 to 40 degrees Fahrenheit. Do not freeze the base solid. If it is partially frozen, it will not churn properly. A properly chilled base will freeze faster and produce smaller ice crystals.
Pour the chilled base into your ice cream maker and start churning according to the manufacturer's instructions. Most machines take 20 to 30 minutes. Keep an eye on the texture. The ice cream is ready when it has the consistency of soft-serve and has increased in volume. It should look smooth and creamy, not soupy or crumbly. If you are using a freezer bowl, make sure the bowl is completely frozen before you start. If the machine slows down or stalls, the mixture is too thick or the bowl is not cold enough. Do not overchurn. Overchurning can incorporate too much air, making the ice cream foamy, or it can cause the fat to churn into butter. If you see buttery flecks, you have overchurned. Stop immediately and proceed to hardening.
Mix-ins such as chocolate chips, nuts, fruit, or cookie pieces should be added in the last few minutes of churning. If you add them too early, they will sink to the bottom or get crushed. If you add them after churning, they will not be evenly distributed. The best time is when the ice cream is almost ready, about 2 to 3 minutes before the end. Make sure mix-ins are cold or frozen. Warm mix-ins will raise the temperature of the ice cream and cause melting. For chocolate chips, use mini chips or chop them finely. For fruit, use dried fruit or fruit that has been macerated in sugar and drained. For nuts, toast them and cool completely. For cookies, break them into small pieces. Always add mix-ins gradually and let the machine incorporate them.
After churning, the ice cream will be soft. It needs to harden in the freezer for at least 2 to 4 hours. Transfer it to a cold, airtight container. Press plastic wrap directly onto the surface to prevent ice crystals from forming. Then cover with a lid. Place the container in the coldest part of your freezer. Do not put it in the door, where the temperature fluctuates. The hardening process allows the ice cream to firm up and the flavors to develop. If you skip this step, the ice cream will be soft and may melt quickly. During hardening, the ice crystals that formed during churning will stabilize. If you want extra smoothness, you can stir the ice cream once after an hour of hardening to break up any large crystals. This is a trick used by some professionals.
If your ice cream is icy or crunchy, the most likely cause is slow freezing. This can happen if the bowl was not cold enough, the base was too warm, or the machine was not churning efficiently. To fix this, ensure your freezer bowl is frozen solid for at least 24 hours. Chill your base overnight. Use a higher-fat recipe. Add a stabilizer such as cornstarch, gelatin, or commercial ice cream stabilizer. Churn for the full recommended time, but do not overchurn. If the ice cream is already made and icy, you can let it soften slightly, then re-churn it in the machine for a few minutes. This will break up the large crystals. Alternatively, you can use it in a milkshake or as a base for a smoothie.
A buttery or greasy texture means the fat has separated or churned into butter. This can happen if the fat content is too high, if the base was overchurned, or if the mixture was too warm during churning. To prevent this, keep fat content under 16 percent. Do not overchurn. If you see the mixture starting to look grainy or buttery, stop immediately. Also, make sure the base is cold before churning. If the base is warm, the fat may melt and separate. If you are using a custard base, make sure it is fully emulsified. If it has curdled, strain it before churning. If your ice cream is already greasy, you can try to rescue it by melting it down, adding a little milk, and re-churning. But prevention is better.
If your ice cream is soft or soupy, it may not have enough fat or stabilizer, or it may have too much sugar or alcohol. Sugar and alcohol lower the freezing point, so a base with too much of either will not freeze firmly. Reduce the amount of sugar or alcohol. Increase the fat content. Add a stabilizer. Also, make sure you are hardening the ice cream long enough. A soft texture right after churning is normal, but it should firm up in the freezer. If it does not firm up after 4 hours, there is a formulation issue. Another cause is a freezer that is not cold enough. Check your freezer temperature. It should be 0 degrees Fahrenheit or lower. If your freezer is above 5 degrees, ice cream will not harden properly.
If your ice cream won't freeze at all, the problem is usually the machine or the base temperature. If you are using a freezer bowl, it may not be frozen solid. If you are using a compressor model, the compressor may not be working. Check the machine. If the base is too warm, it will not freeze. Chill it thoroughly. If the base has a very high sugar or alcohol content, it may not freeze. In that case, you need to adjust the recipe. Some people try to make ice cream with a lot of vodka or rum. While a little alcohol can improve smoothness, too much will prevent freezing. As a rule, do not add more than 2 tablespoons of alcohol per quart of base.
Grainy texture is similar to icy texture but often refers to a sandy or powdery mouthfeel. It can be caused by undissolved sugar, cocoa powder, or stabilizer. Always dissolve sugar completely in the base. If you are using cocoa powder, whisk it with a little hot liquid to make a paste before adding it to the base. If you are using stabilizers, disperse them evenly. A blender can help. Graininess can also come from egg proteins that have coagulated. If you are making a custard base, strain it after cooking. If the graininess is from ice crystals, follow the advice for icy texture.
A high-speed blender is a secret weapon for smooth ice cream. After cooking and chilling your base, blend it for 30 to 60 seconds until it is completely smooth. This breaks up any remaining fat globules and ensures that stabilizers are fully hydrated. It also incorporates a little air, which can help with texture. If you are using a custard base, blending after straining gives an ultra-silky result. Some people even blend the base after churning, but that would destroy the air bubbles. So blend before churning. A blender is also useful for pureeing fruit for sorbets and ice creams. If you are looking for a reliable blender, companies like Jiangmen Taifai Technology Co.,Ltd (TAIFAI) manufacture high-quality electric blenders and other kitchen appliances. Their products are designed for performance and durability, and they offer OEM and ODM services. A good blender can make a noticeable difference in the smoothness of your ice cream base.
Aging the base is a professional technique that dramatically improves smoothness. After you make and chill the base, let it rest in the refrigerator for 4 to 24 hours. During this time, the fat globules crystallize, the proteins hydrate, and the stabilizers fully absorb water. This results in a smoother texture and better flavor. Many ice cream recipes say to chill overnight, but aging is more than just chilling. It is a maturation process. If you want the smoothest possible ice cream, do not skip this step. Plan ahead and make your base the day before you want to churn.
Overrun is the amount of air incorporated into the ice cream. For a dense, creamy texture, aim for low overrun. This means churning for a shorter time or at a slower speed. However, if you churn too little, the ice cream will not freeze properly. The ideal is to churn until the mixture is just thick and creamy, about 20 to 25 minutes for most machines. If you want even lower overrun, you can use a machine with a slower dasher. Some compressor models have a setting for dense ice cream. You can also stop the machine, scrape down the sides, and continue. But be careful not to overchurn. The goal is a balance between air and creaminess.
Alcohol is a double-edged sword. A small amount can improve smoothness by lowering the freezing point and preventing large ice crystals. But too much will prevent freezing. Use no more than 1 to 2 tablespoons of high-proof alcohol per quart of base. Vodka is a good choice because it is neutral. Rum, bourbon, or brandy can add flavor. Add the alcohol after the base has chilled, just before churning. If you add it to the warm base, the alcohol may evaporate. If you want a stronger flavor, you can add a little more, but be prepared for a softer texture. You can also swirl alcohol into the ice cream after churning, but this will not help with smoothness.
Inverted sugar is a mixture of glucose and fructose. It is sweeter than sucrose and more effective at lowering the freezing point. It also interferes with ice crystal growth. You can buy inverted sugar or make it by heating sugar with a little lemon juice and water. Glucose syrup, also known as corn syrup, is another option. Replace 20 to 30 percent of the sugar in your recipe with glucose syrup. This will improve smoothness and reduce the risk of iciness. It also helps prevent the ice cream from becoming too hard in the freezer. If you use glucose, reduce the total sugar slightly because glucose is less sweet. A little goes a long way.
Straining the base is a simple step that removes any solids that could become icy or grainy. After cooking a custard base, pour it through a fine-mesh sieve. This removes any coagulated egg bits. After blending a fruit base, strain it to remove seeds and pulp. Even if you are using a simple Philadelphia-style base, straining can remove any undissolved sugar or stabilizer clumps. Use a fine-mesh strainer or a double layer of cheesecloth. Press on the solids to extract all the liquid. This step takes only a few minutes but makes a big difference in texture.
Mix-ins can introduce water and warmth, both of which are enemies of smooth ice cream. Always pre-freeze mix-ins like fruit, chocolate chunks, and nuts. Frozen fruit is less likely to bleed its juices and create ice crystals. Chocolate chunks should be cold so they do not melt. Nuts should be frozen to prevent them from becoming soggy. If you are adding a swirl, such as caramel or fudge, make sure it is at room temperature but not warm. Warm swirls can melt the ice cream. Add swirls after churning by layering them in the container and gently folding. Do not overmix, or you will destroy the smooth texture.
Speed is essential when transferring ice cream from the machine to the container. The longer the ice cream sits at room temperature, the more it melts and the larger the ice crystals become when it refreezes. Have your container pre-chilled in the freezer. Use a cold spatula or scoop. Work quickly but gently. Once the ice cream is in the container, press plastic wrap directly on the surface and put it in the freezer immediately. Do not let it sit on the counter. If you are adding mix-ins, have them ready before you start churning. Every second counts.
Ice cream is a frozen dessert typically made from dairy, sugar, and flavorings. In the United States, ice cream must contain at least 10 percent milkfat and 20 percent milk solids. It is churned to incorporate air and create a smooth texture. The high fat content and overrun make it creamy and scoopable. Premium ice cream has less overrun and more fat, resulting in a denser, richer product.
Gelato is the Italian version of ice cream. It is denser and smoother because it is churned more slowly, incorporating less air. It also typically contains more milk and less cream, and sometimes egg yolks. Gelato is served slightly warmer than ice cream, which enhances its smooth, silky texture. The lower fat content means it can be more prone to iciness, so stabilizers are often used.
Sorbet is a dairy-free frozen dessert made from fruit puree, sugar, and water. It contains no fat, so it can easily become icy. To keep sorbet smooth, it is important to use a sugar syrup, add a stabilizer like glucose or xanthan gum, and churn it quickly. A little alcohol can also help prevent large ice crystals.
Sherbet is similar to sorbet but contains a small amount of dairy, usually milk or cream. It has a creamier texture than sorbet but is lighter than ice cream. The fat content is typically 1 to 2 percent. The dairy helps improve smoothness, but stabilizers are still useful.
Frozen yogurt is made from yogurt and can be either soft-serve or hard-packed. It has a tangy flavor and is often lower in fat than ice cream. The yogurt cultures and proteins can help with texture, but the lower fat content means it can be icier. Adding stabilizers and a little cream can improve smoothness.
Kulfi is a traditional Indian frozen dessert made from milk that has been reduced and thickened. It is dense and creamy, often flavored with cardamom, saffron, and nuts. Because it is not churned, it can be icy if not prepared properly. The reduction process concentrates the milk solids, which helps create a smooth texture.
Semifreddo is an Italian dessert that is semi-frozen. It is made from egg yolks, sugar, and cream, and is often flavored with chocolate, fruit, or nuts. It is not churned, so it has a mousse-like texture. It is smoother than ice cream but softer and melts quickly.
Milk proteins, primarily casein and whey, play a role in the structure of ice cream. They help stabilize the foam and bind water. When milk is heated, the proteins denature and can improve water binding, which reduces iciness. This is why custard bases, which are heated, tend to be smoother. Whey proteins can also contribute to a creamy mouthfeel. If you want to boost protein, you can add milk powder, but too much can make the ice cream chalky.
Lactose is the sugar naturally present in milk. It is less sweet than sucrose and can contribute to a sandy texture if it crystallizes. This is more of a problem in high-milk solids ice creams. Using a stabilizer can help prevent lactose crystallization. Lactose also lowers the freezing point slightly.
Minerals and salts in dairy affect flavor and freezing point. They also influence the stability of the emulsion. A small amount of salt enhances flavor and can help with texture. Do not omit salt from your ice cream base. It makes a noticeable difference.
Flavorings can be extracts, purees, spices, or alcohol. Extracts are concentrated and should be used sparingly. Purees add water and sugar, so you may need to adjust the base. Spices should be fresh and finely ground. Alcohol adds flavor but also affects freezing point. Always taste your base before churning and adjust as needed.
Acids, such as lemon juice or citric acid, can be used to balance sweetness in fruit desserts. They can also affect the stability of dairy proteins. If you add too much acid to a dairy base, it can curdle. Add acids carefully and in small amounts.
The dasher is the paddle that churns the ice cream. A good dasher has scraper blades that continuously scrape the sides and bottom of the bowl. This prevents the formation of a frozen layer that would insulate the rest of the mixture. Some dashers are made of plastic, others of metal. Metal dashers are more durable and conduct cold, which can help freeze the mixture faster. The shape of the dasher also affects how efficiently it incorporates air. A dasher with a wide, flat design is good for low overrun, while a dasher with more surface area can incorporate more air.
Freezer bowls are typically made of aluminum or plastic with a coolant gel. Aluminum conducts cold better than plastic, so aluminum bowls freeze faster. However, aluminum can react with acidic mixtures. If you are making a fruit sorbet, a plastic bowl may be better. Compressor bowls are usually stainless steel or aluminum. Stainless steel is durable and easy to clean. The thickness of the bowl also matters. A thicker bowl holds cold longer but takes longer to freeze.
The motor power determines how well the machine can churn as the mixture thickens. A weak motor may stall when the ice cream becomes thick, leading to uneven freezing. Look for a motor that is at least 15 watts for freezer bowl models, and more for compressor models. A powerful motor also allows you to churn denser bases, such as those with high fat or added mix-ins.
Insulation in the bowl or the machine housing helps maintain a consistent temperature. Freezer bowls are insulated by their double walls. Compressor models have insulation around the freezing cylinder. Good insulation reduces temperature fluctuations, which helps prevent ice crystal growth. If your machine lacks insulation, you may need to work in a cold room or pre-chill the machine.
For freezer bowl machines, the process is straightforward. Freeze the bowl for 24 hours. Make and chill the base overnight. Assemble the machine, turn it on, and pour the base through the spout while the dasher is turning. Let it churn for 20 to 30 minutes. The ice cream will be soft. Transfer to a container and harden for 2 to 4 hours. The key is to ensure the bowl is completely frozen and the base is very cold. Do not let the bowl thaw between batches. If you want to make a second batch, you need a second frozen bowl or wait 24 hours.
Compressor machines are easier to use. Turn on the machine and let it pre-cool for 5 to 10 minutes if recommended. Pour in the chilled base and churn for 20 to 30 minutes. The machine maintains a constant freezing temperature, so you do not need to worry about the bowl thawing. You can make multiple batches in a row. After churning, transfer to a container and harden. Compressor machines are ideal for entertaining because you can make several flavors without waiting.
Hand-crank machines require more effort. Fill the outer bucket with ice and rock salt in layers. Pour the chilled base into the inner canister. Insert the dasher and crank. Crank steadily for 20 to 30 minutes. As the ice melts, add more ice and salt. The salt lowers the melting point of ice, creating a brine that is colder than 32 degrees Fahrenheit. This freezes the base. The constant cranking breaks up ice crystals. When the crank becomes hard to turn, the ice cream is ready. Transfer to a container and harden.
Donvier machines are a type of hand-crank freezer bowl. You freeze the bowl, pour in the base, and insert the dasher. Then you turn the crank every few minutes for about 20 minutes. The bowl freezes the mixture from the outside in. You do not need to crank constantly, but you must crank regularly to break up ice crystals. These machines are simple and quiet, but they produce a slightly icier texture than motorized machines.
Use an airtight container that is specifically designed for ice cream. A shallow container is better than a deep one because it allows the ice cream to freeze more evenly. Metal containers conduct cold better than plastic, but plastic is lighter and less expensive. Glass is not ideal because it can crack in the freezer and does not conduct cold well. Whatever container you use, make sure it is pre-chilled in the freezer before you fill it.
Ice crystals can form on the surface of ice cream during storage. To prevent this, press a piece of plastic wrap directly onto the surface of the ice cream before putting on the lid. This blocks air and moisture. You can also use a layer of wax paper. Another trick is to place a piece of parchment paper on top and then seal the container. The goal is to minimize the air space above the ice cream. If you see ice crystals forming, you can scrape them off before serving. To further prevent crystals, store the ice cream in the coldest part of the freezer, not in the door.
A warm scoop makes serving ice cream easier and more attractive. Dip your scoop in hot water, dry it, and then scoop. The warmth helps the ice cream release from the scoop. Do not use a hot scoop on the entire container, as it will melt the ice cream. Just warm the scoop for each serving. You can also run the outside of the container under warm water for a few seconds to loosen the ice cream from the sides.
Ice cream is best served at about 8 to 12 degrees Fahrenheit. If it is too cold, it will be hard and flavorless. If it is too warm, it will melt quickly. Let the ice cream sit at room temperature for 5 to 10 minutes before scooping. This allows it to soften slightly and release its flavors. For gelato, serve it a few degrees warmer, around 15 degrees Fahrenheit, to enhance its silky texture.
Chocolate ice cream can be made with cocoa powder or melted chocolate. Cocoa powder gives a deep, rich flavor but can be grainy if not dissolved properly. Melted chocolate adds fat and smoothness. For the smoothest chocolate ice cream, use a combination of cocoa powder and melted dark chocolate. Add a pinch of salt to enhance the chocolate flavor. Mix-ins like chocolate chips, brownie pieces, or chocolate chunks are classic.
Vanilla is the most popular flavor. Use real vanilla extract or vanilla bean paste for the best flavor. Vanilla bean seeds add visual appeal. For a smooth texture, use a custard base. Vanilla pairs well with caramel, chocolate, and fruit swirls.
Strawberry ice cream can be made with fresh or frozen strawberries. Macerate the strawberries in sugar to release their juices, then drain and puree. Add the puree to the base. The sugar helps prevent the strawberries from becoming icy. For a smoother texture, strain the puree to remove seeds. Add a little lemon juice to brighten the flavor.
Use fresh mint leaves or peppermint extract. Fresh mint gives a more natural flavor but can be bitter if steeped too long. Peppermint extract is stronger and easier. Add mini chocolate chips in the last few minutes of churning. For a green color, use a natural food coloring like spinach powder, but it is optional.
Coffee ice cream is made by steeping coarsely ground coffee in the warm base, then straining. Alternatively, use espresso powder dissolved in a little warm milk. Coffee pairs well with chocolate, caramel, and nuts. For a smooth texture, use a custard base and a high-fat cream.
Caramel ice cream can be made by adding caramel sauce to the base or by swirling caramel into the churned ice cream. If adding to the base, use a thick caramel sauce. If swirling, layer the caramel with the ice cream in the container and fold gently. Do not overmix, or the caramel will dissolve. Salted caramel is a popular variation.
Nuts add crunch and flavor. Toast nuts before adding to enhance their flavor. Cool them completely before adding to the ice cream. Chop them into small pieces. Pecans, walnuts, almonds, and pistachios are all excellent choices. For a smoother texture, use nut pastes or butters instead of pieces.
Fruit swirls add ribbons of flavor. Use a thick fruit sauce or jam. Make sure it is cold. After churning the ice cream, layer it in the container with the fruit sauce. Use a knife or spatula to swirl it gently. Do not stir too much, or the swirl will blend into the ice cream. Raspberry, mango, and blueberry swirls are popular.
Low-fat ice cream is challenging because fat is what makes ice cream smooth. To compensate, use stabilizers, egg whites, or milk powder. You can also add a small amount of alcohol or glucose. Churn quickly and harden thoroughly. Accept that the texture will be slightly icier than full-fat ice cream.
Sugar-free ice cream uses sugar substitutes like erythritol, xylitol, or stevia. These substitutes do not lower the freezing point as much as sugar, so the ice cream can freeze very hard. To soften it, add a little glycerin or alcohol. Erythritol can also cause a cooling sensation. Use a stabilizer to improve texture. Sugar-free ice cream is best eaten soon after making, as it becomes hard in the freezer.
Vegan ice cream uses plant-based milks like coconut, almond, soy, or oat. Coconut milk is the best for smoothness because it is high in fat. Almond and oat milk are lower in fat, so you need to add fat in the form of coconut oil, cocoa butter, or nut butter. Use a stabilizer like xanthan gum or guar gum. Churn quickly and harden. Vegan ice cream can be just as smooth as dairy ice cream with the right formulation.
Keto ice cream is high in fat and low in carbs. Use heavy cream, egg yolks, and sugar substitutes like erythritol or allulose. Allulose is particularly good because it does not crystallize and has a similar freezing point depression to sugar. Add a stabilizer to prevent iciness. MCT oil can also improve texture. Keto ice cream is rich and satisfying.
Dairy-free ice cream is similar to vegan ice cream. Avoid all dairy products, including milk, cream, and eggs. Use plant-based milks and fats. Check that your stabilizers are dairy-free. Some commercial stabilizers contain milk solids, so read labels carefully. Dairy-free ice cream can be smooth if you use enough fat and a good stabilizer.
Getting smooth results with an ice cream maker at home is entirely achievable. It requires attention to a few key factors: the temperature of your bowl and base, the balance of fat, sugar, and water, the use of stabilizers and emulsifiers, and proper churning and hardening techniques. By understanding the science behind ice cream, you can troubleshoot any problem and consistently produce creamy, scoopable desserts. Remember to freeze your bowl completely, chill your base thoroughly, use a well-formulated recipe, and work quickly. Do not be afraid to experiment with stabilizers, glucose, and alcohol to find the perfect texture for your taste. With practice, you will be making ice cream that rivals your favorite shop. And when you need reliable kitchen appliances to support your efforts, consider the quality and innovation offered by manufacturers like TAIFAI. Their range of blenders, choppers, and mixers can help you prepare the perfect base and mix-ins. So go ahead, churn a batch, and enjoy the smooth, delicious results of your homemade ice cream.
This guide has covered everything from the science of ice crystals to the practical steps of preparing your machine and base. Whether you are a beginner or an experienced home cook, these tips will help you achieve the smooth, creamy texture you desire. Happy churning!


